


 Monstrous Menu
If there's one thing I love to do it is bake. Combine that with one of my favorite holidays and
 you have a menu of sweeties, spooky entrees and tons of homemade candy! Here is a list I've put together of my favorite Halloween treats to make during my favorite time of year. Grab a pen and save these in your recipe box!
Tags
Appetizers • Entrees • Desserts • Party Food
Appetizers
| Saucy Spider with Hairy Leg Sticks | ||||||||
|---|---|---|---|---|---|---|---|---|
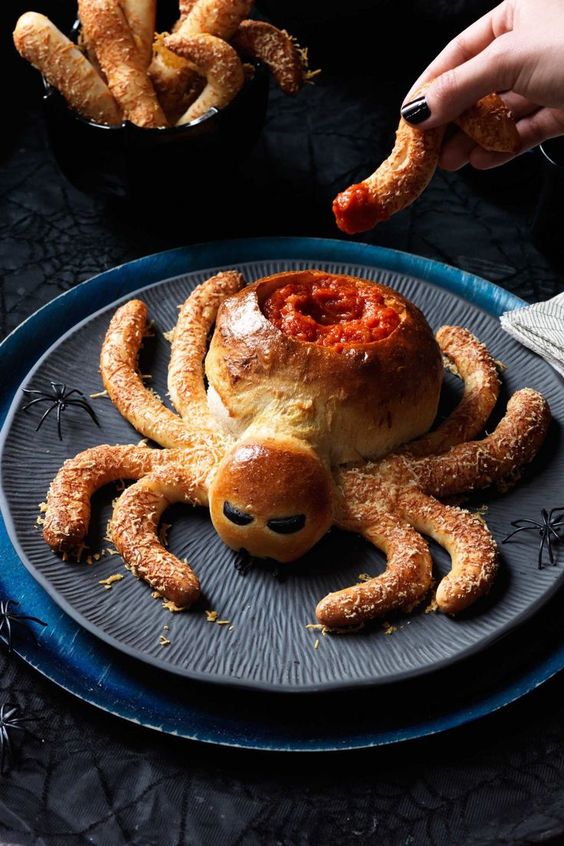
Directions: 1. Heat oven to 375°F. Line 2 large baking sheets with parchment paper. 2. Make the spider: Cut 1 ball of dough in half. Shape one half into a 5-in. ball to make the spider body. Cut a 1 1/2-in. strip from the remaining half and shape into a 2 1/2-in. ball to make the head. Cut the remaining dough into 8 strips and roll each strip into a 6-in. rope to make the legs. 3. Arrange the body, legs and head on one of the  prepared baking sheets to resemble a spider, gently pressing all of the pieces of dough together. Brush the entire spider with some of the egg. Sprinkle the legs with 2 Tbsp Parmesan. Place 2 of the olive slices on the top of the head for eyes and 2 on the bottom for pincers. Bake until golden brown, 25 to 30 minutes (covering the legs with foil if browning too quickly). prepared baking sheets to resemble a spider, gently pressing all of the pieces of dough together. Brush the entire spider with some of the egg. Sprinkle the legs with 2 Tbsp Parmesan. Place 2 of the olive slices on the top of the head for eyes and 2 on the bottom for pincers. Bake until golden brown, 25 to 30 minutes (covering the legs with foil if browning too quickly).4. Meanwhile, make the spider leg sticks: Cut the remaining ball of dough into 8 pieces. Roll each piece into a 3/4-in.-thick rope. Cut each rope into various lengths. Taper one end of each piece and slightly bend the other to resemble legs. Place on the second baking sheet. Brush with the remaining egg and sprinkle with the remaining 1/4 cup Parmesan. Bake until golden brown, 15 to 20 minutes. 5. Meanwhile warm the marinara sauce. Using a knife, hollow out the body of the spider and fill with the warm sauce. Serve with the leg sticks. .gif) .gif) |
||||||||
| Pumpkin Pie Dip | ||||||||
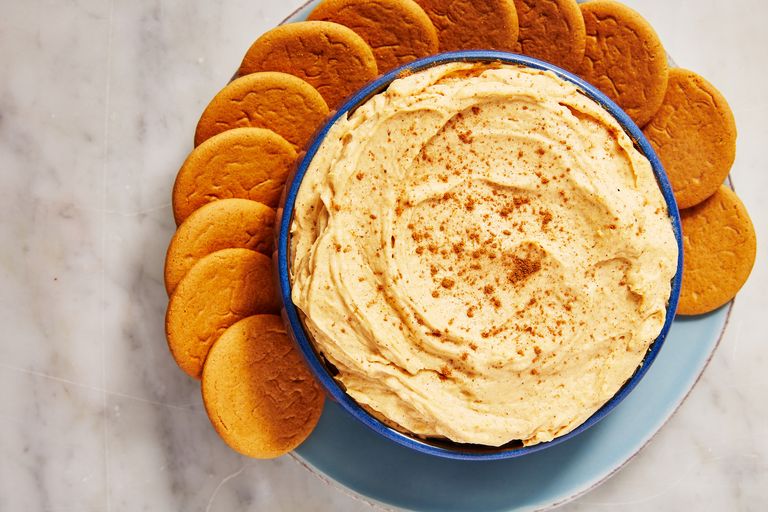
 Directions: 1. In a stand mixer, beat heavy cream and vanilla pudding mix until stiff peaks form, 1 to 2 minutes. 2. Add pumpkin and pumpkin pie spice and stir to combine, then chill if desired. Serve with ginger snaps. .gif) .gif) |
||||||||
| Cornbread Spiders | ||||||||
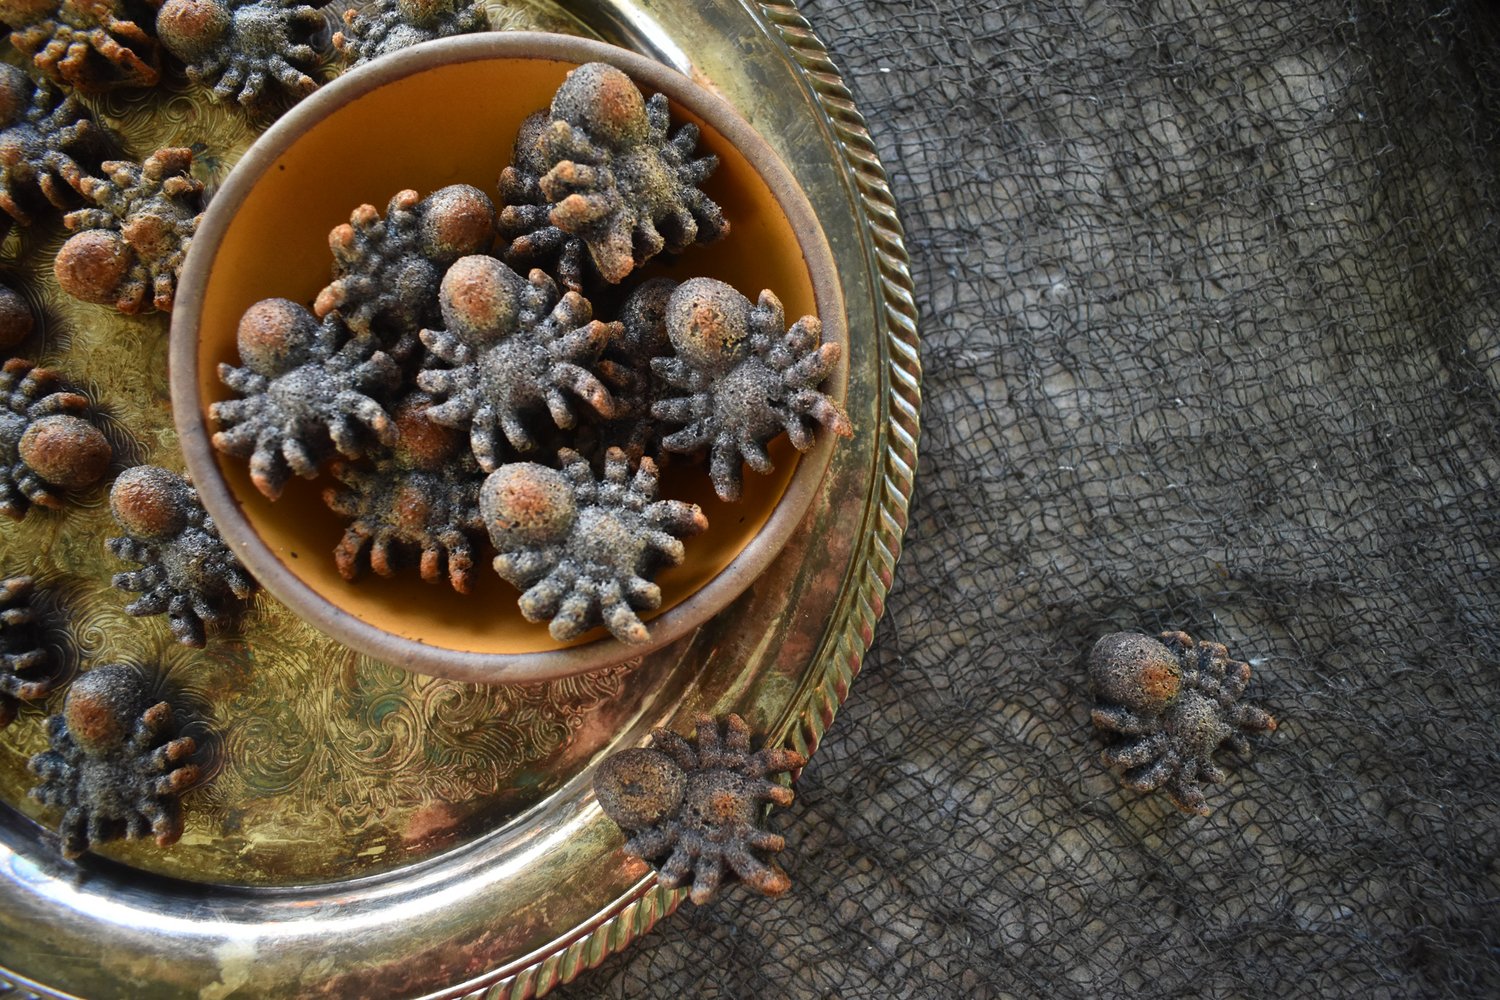
Directions: 1. Preheat oven to 425F. 2. Mix together dry ingredients (cornmeal, baking powder, salt). 3. Mix together wet ingredients (egg, milk, oil, and honey). 4. Stir wet ingredients into dry ingredients. 5. Place silicone baking mold onto a heavy sheet pan. Pour cornbread batter into molds filling almost to the top 6. Bake on top rack of the oven for 10-12 minutes. .gif) .gif) |
| Eyeball Pasta Pie | ||||||||
|---|---|---|---|---|---|---|---|---|
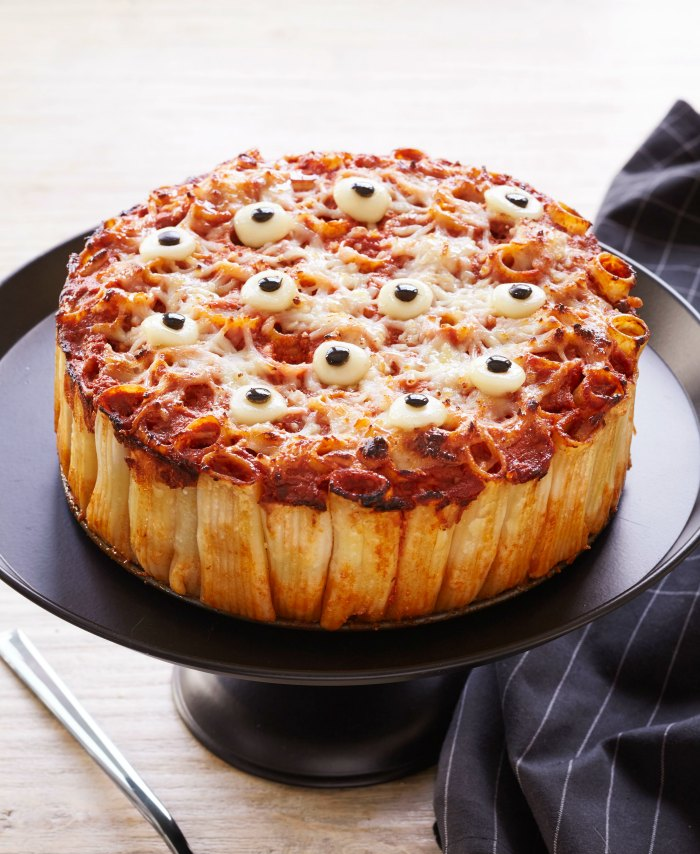
Directions: 1. Heat the oven to 400°F. Cook the pasta according to package directions; drain. Mix in 1 Tbs. olive oil and let cool.  2. While the pasta is boiling, brush the inside of a 9-inch springform pan with olive oil. In a separate bowl, mix ½ cup Parmesan with the sauce. 2. While the pasta is boiling, brush the inside of a 9-inch springform pan with olive oil. In a separate bowl, mix ½ cup Parmesan with the sauce.3. Add remaining Parmesan to the rigatoni and toss until the pasta is coated. 4. Tilt the pan against a pot or bowl, then layer the pasta into the pan until it is filled. Adjust as needed so that they stand on their ends, then set the pan on its bottom. Pour on half the sauce, and cover with plastic wrap. Then tap the pan on the counter to work the sauce inside the pasta. 5. Remove wrap, add remaining sauce, and bake for 15 minutes. Remove; top with shredded mozzarella. 6. Bake 15 minutes or until the cheese is golden. Remove, add mozzarella rounds, and put back in for 2 minutes or until they are just barely melted. 7. Slice ends from olives (or punch with a straw). Press olives into the melted cheese. Allow the pie to rest for 10 to 15 minutes, then remove the outer ring and slice to serve. .gif) .gif)
|
||||||||
| Cheesy Broccoli and Chicken Stuffed Skulls | ||||||||
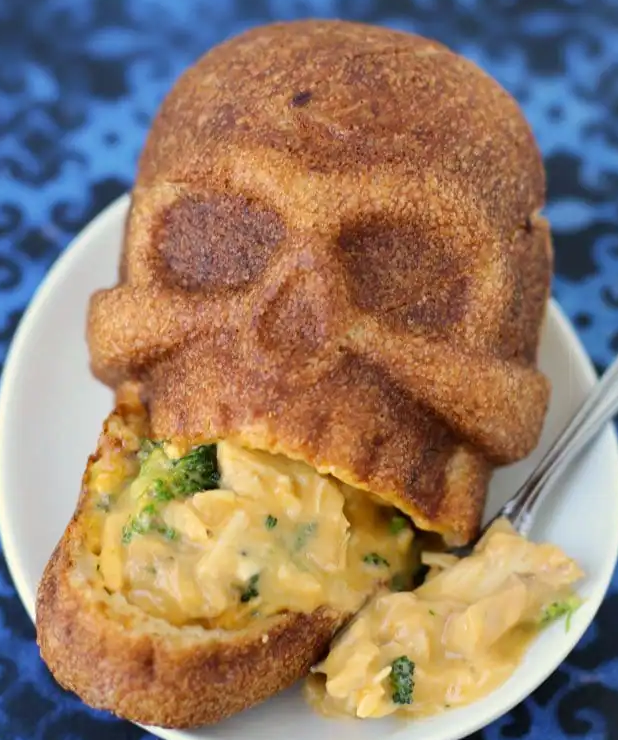
** NOTE YOU WILL NEED NORDICWARE SKULL PANS. YOU CAN FIND THEM HERE ** Directions: 1. Preheat oven to 375 degrees Fahrenheit. 2. Brush 8 skull cavities in 2 skull pans with butter or spray with non-stick spray. 3. Combine Cheesy Broccoli Chicken Oven Sauce with broccoli, chicken, and cheese. Stir until well combined. 4. Unroll tubes of pizza dough. Cut dough in half. 5. Lay 1 piece of dough over a skull cavity in a pan. 6. Continue filling 8 skulls with dough. 7. Equally divide the filling among the 8 skulls. 8. Fold dough over top of filling, cutting off excess, pinching together the seams. 9. Brush egg wash over tops of dough. 10. Bake for 24-28 minutes until the top dough is baked through. .gif) .gif) |
||||||||
| Toxic Waste Mac and Cheese | ||||||||
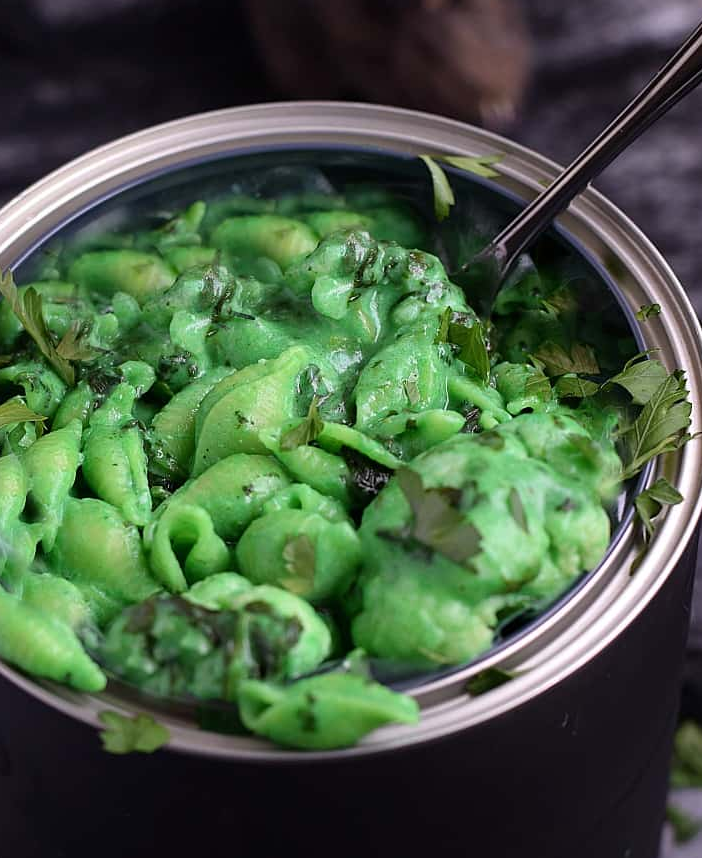
Directions: 1. Melt butter in a large pan/Dutch oven over medium-low heat. 2. Add the flour and whisk to combine. Simmer, stirring constantly for 1 to 2 minutes. 3. Pour in the milk and whisk to combine and remove all lumps. 4. Add the salt, pepper, onion powder, paprika, cayenne, and mustard, stir to combine. 5. Continue cooking until mixture starts to simmer, 6 to 8 minutes. 6. Remove from heat and add the grated cheese. Stir until melted and completely combined. 7. Add the drained spinach, stir to combine. Add a few drops of green food coloring if desired. 8. Add the drained pasta and stir until completely coated. 9. Stir in the steamed cauliflower, and serve immediately. **I left my cauliflower in large chunks and waited until the very end to add them so they would stay whole, and so they would look creepier sitting near the top. .gif) .gif) |
||||||||
| Sixpence Meat Pies | ||||||||
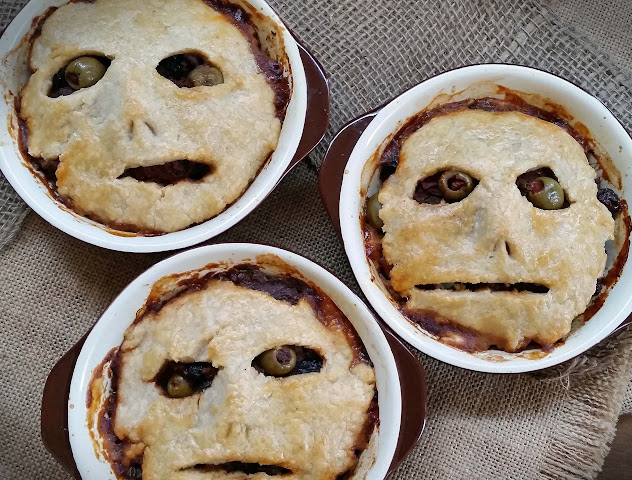
Masa Pie Crust: 1/2 cup all purpose flour, 1/2 cup Masa (corn flour), 1/2 cup shortening or butter, 1/4 cup ice water, 1/2 t salt, egg wash. Directions: 1. Preheat oven 350 degrees. 2. Saute the onion and bell pepper in olive oil in a large skillet until onions are soft about 5 minutes, then add the garlic and ground beef. Mix all ingredients together as the ground beef browns. Add tomatoes, cumin, oregano, and bay leaf, cover and simmer for about 15 minutes or longer. Add olives and raisins and simmer for an additional 5 minutes. Divide picadillo mixture into four individual casserole dishes and prepare masa dough. 3. Mix flours and cut in shortening or butter with the back of a fork until the dough is crumbly. Add ice water and blend until it forms a smooth ball. Make sure you don't work the dough too much or it will be tough. Cut dough into 4 equal portions and roll each portion out with a rolling pin to create 4 rough edged pie crusts. Use a knife to cut out rough faces. Place dough over the picadillo meat mixture allowing olives to show through eye holes. Pinch the dough to create the bridge of a nose. Don't worry if the dough cracks, it adds to the Leatherface feel of the pot pies. 4. Brush an egg wash over the crusts to ensure a golden brown. Bake at 350 degrees for 35-40 minutes. Ovens vary so watch closely so they don't burn. Let cool slightly and enjoy! .gif) .gif) |
| Vampire Cookies | ||||||||
|---|---|---|---|---|---|---|---|---|
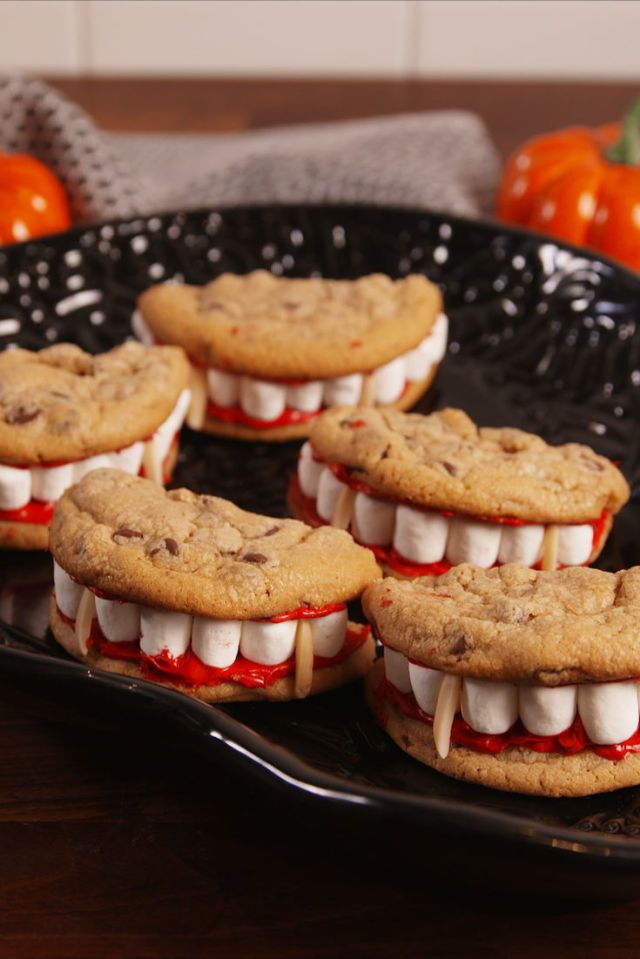
 Directions: 1. Preheat oven to 350°. Line two large baking sheets with parchment paper. Roll cookie dough into 1 ½” balls and place on baking sheets. Bake until golden, about 12 minutes. Let cool completely then cut in half. 2. Add a few drops of red food coloring into vanilla frosting and stir until smooth. Spread a thin layer of red frosting onto each cookie half. 3. Place mini marshmallows around the round edges of half of the halves. Place the remaining halves on top, then stick a slivered almond on each side to create fangs. .gif) .gif) |
||||||||
| Melted Witch Pudding Parfaits | ||||||||
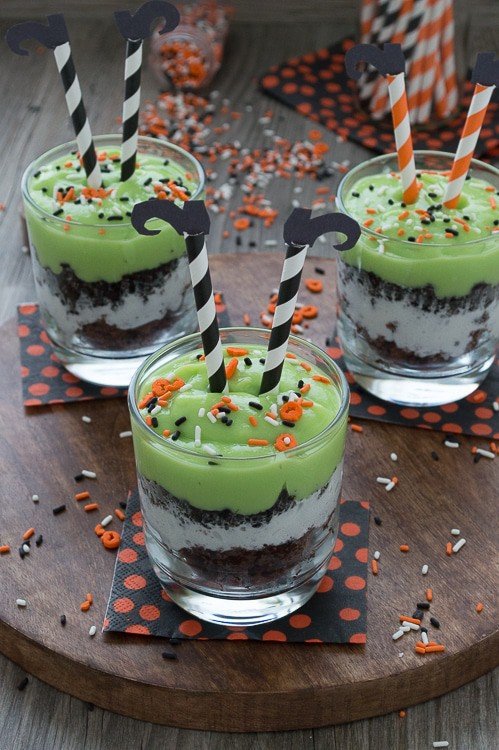
Directions: 1. Dye the vanilla Snack Pack pudding cups green. This can be done in each individual pudding container or transfer all of the pudding to a bowl and then add the green food coloring until you get your desired color of green. Set aside. 2. To assemble the parfaits, begin to layer brownie pieces in the bottom of each glass. Divide the brownie pieces evenly among the parfaits. 3. Next, add a layer of whipped cream to each parfait (like Reddi wip). 4. Add the crushed oreos on top of the whipped cream layer. 5. Next, spoon the green Snack Pack Pudding on top of the oreos, filling each glass full. 6. Add halloween sprinkles and top with the witch's legs. 7. For best results, enjoy these parfaits within a few minutes of making, otherwise the ingredients can become soggy. .gif) .gif) |
||||||||
| Scarecrow Bars | ||||||||
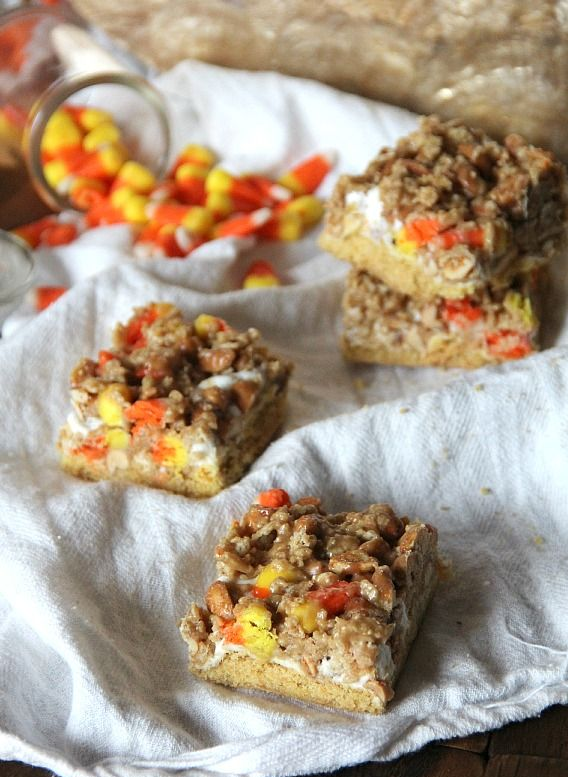
Directions: 1. Preheat oven to 350°.  2. Spray a 9×13 pan with nonstick spray. 2. Spray a 9×13 pan with nonstick spray.3. In your stand mixer, combine cake mix, egg and butter. Stir on medium-low speed until a thick batter comes together. Press into the bottom of the prepared pan. Bake for 15 minutes, until the edges of the crust are lightly browned. 4. While crust is baking make your topping. In a medium saucepan combine corn syrup and both sugars, heating over medium until is starts to boil. Remove from heat and stir in vanilla and peanut butter. Return back to stove top on the lowest setting until the crust is done baking. You don’t want to continue cooking the peanut butter mixture, you just want to keep it warm. 5. As soon as crust is done, sprinkle with marshmallows and put back in the oven for 1-2 minutes until the marshmallows puff. Remove immediately. 6. While the marshmallows are puffing mix your peanuts, Rice Chex and Candy Corn into the peanut butter mixture. Stir until coated evenly. 7. Immediately spread this over the marshmallows as soon as they come out of the oven. 8. Let cool completely before cutting into squares. .gif) .gif) |
||||||||
| Zombie Brain Brownie Bites | ||||||||
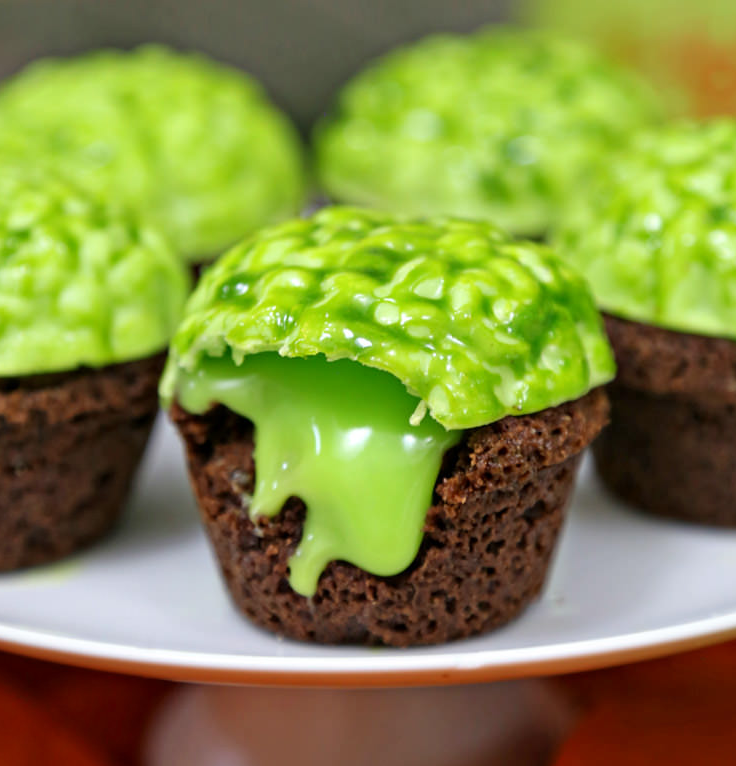
Directions: 1. Preheat the oven to 350 F, and spray two mini cupcake pans very well with nonstick cooking spray. 2. repare the brownie mix according to the directions on the package. Use a cookie scoop or large spoon to fill each mini cupcake cavity almost to the top. You should get about 20 brownie bites from this recipe. 3. Bake the brownie bites for 15 minutes, until the top is puffed and crackly, and a toothpick inserted into the center comes out with just a few moist crumbs attached. Cool completely, then run a thin metal spatula around the edges and pop the brownies out of the pan. (If they start to tear, refrigerate them briefly so they firm up before removing.) 4. Combine 8 oz of candy coating and the International Delight Caramel Macchiato Creamer in a microwave-safe bowl, and heat for 1 minute. Whisk well, and if there are any unmelted pieces, heat again briefly for 10-20 seconds until fully melted and smooth. It will be very loose, like a liquid. Press a layer of cling wrap directly on top of the ganache and refrigerate for at least 2 hours—longer is okay.  5. Melt the remaining 8 oz of candy coating, and place a spoonful in the cavity of a brain candy mold. Use a clean, dry food-safe paintbrush to brush the coating up the sides of the mold. You may not go all the way to the top, depending on the size of your brownie bites. If the top of the mold is wider than the top of your brownie bites, do not extend the coating to the top. Instead, stop a quarter or half inch down from the top (whatever works best for your measurements) so the brains are the same size as the tops of your brownie bites. 5. Melt the remaining 8 oz of candy coating, and place a spoonful in the cavity of a brain candy mold. Use a clean, dry food-safe paintbrush to brush the coating up the sides of the mold. You may not go all the way to the top, depending on the size of your brownie bites. If the top of the mold is wider than the top of your brownie bites, do not extend the coating to the top. Instead, stop a quarter or half inch down from the top (whatever works best for your measurements) so the brains are the same size as the tops of your brownie bites.6. Once all of the molds are filled, place the tray in the freezer for 10 minutes, then gently remove the brains from the molds. Repeat to make more brains, re-warming the candy coating as necessary, until you have a brain for each brownie bite. 7. To assemble, gently press a hole in the top of each brownie bite using your finger or the handle of a wooden spoon. Take a teaspoon-sized scoop of ganache and fill the hole and top  of the brownie bite. Press a chocolate brain on top. If the brain is not touching the ganache, it won’t stay put, so if necessary, fill the top of the brain with ganache and then press it down onto the brownie bite until secure. of the brownie bite. Press a chocolate brain on top. If the brain is not touching the ganache, it won’t stay put, so if necessary, fill the top of the brain with ganache and then press it down onto the brownie bite until secure.8. Once all of the brains are attached, stir together the jelly and a drop of green food coloring, then paint the brains with the glistening mixture. Serve at room temperature, and enjoy! .gif) .gif) |
||||||||
| Graveyard Halloween Brownies | ||||||||
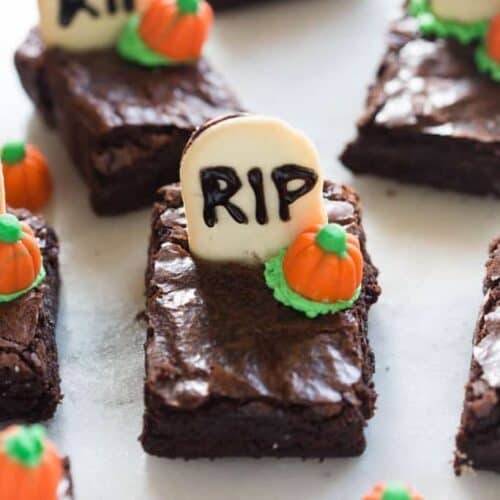
Directions: 1. Line an 8'' baking pan with parchment paper, leaving a little bit of overhang on the sides so that you'll be able to easily pull the brownies out of the pan. 2. Pour brownie batter into the prepared pan and smooth it into an even layer. Bake according to recipe instructions. 3. Allow brownies to cool completely. Pull up on the parchment paper and transfer the brownies to a flat surface. 4. Cut the brownies into rectangles. (I cut mine 4 x 3 to make 12 rectangle brownies). 5. Mix all of the frosting ingredients together in a bowl. Mix for 2 minutes until light and fluffy. (Add a little more powdered sugar to make the mixture thicker, or another dash of milk to make it thinner, as needed.) 6. Mix in a few drops of green food coloring. Set aside. 7. Use the black (edible) gel pen to write the letter R-I-P on the top of each milano cookie. I also cut the very bottom edge off of my cookies to make the "headstones" a little shorter, but you don't have to. 8. Press each cookie into the top of the brownie, as if it were a grave headstone. 9. Spoon a a little green frosting onto the bottoms of the candy pumpkins and add them near the cookie. .gif) .gif) |
||||||||
| Halloween Sugar Cookie Cake | ||||||||
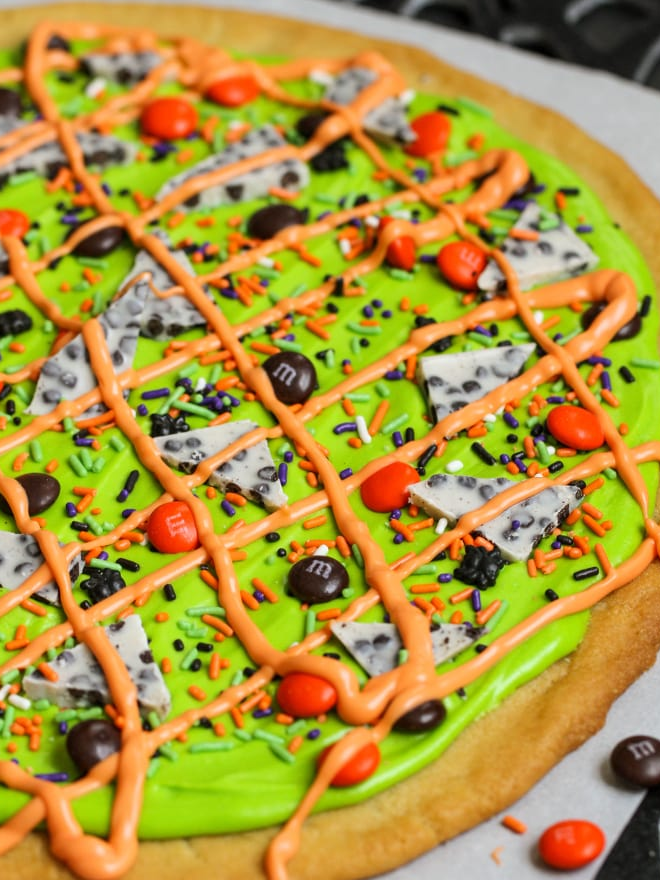
Directions: 1. Begin by preheating oven to temperature on cookie roll. 2. Line a large jelly roll pan with parchment paper. 3. Take out cookie dough from package and press together. Roll out until it's a circle that is about ¼ inch thick. Cook 14-16 minutes or until golden brown. 4. Let cookie cool. 5. Make frosting by beating ½ cup butter and 4 oz. cream cheese until mixed well. Add powdered sugar, milk, vanilla and food coloring. Add to cookies. 6. Top with cut up candy and sprinkles. ENJOY! .gif) .gif) |
||||||||
| Milk Chocolate Stuffed Jack-O’-Lantern Cookies | ||||||||
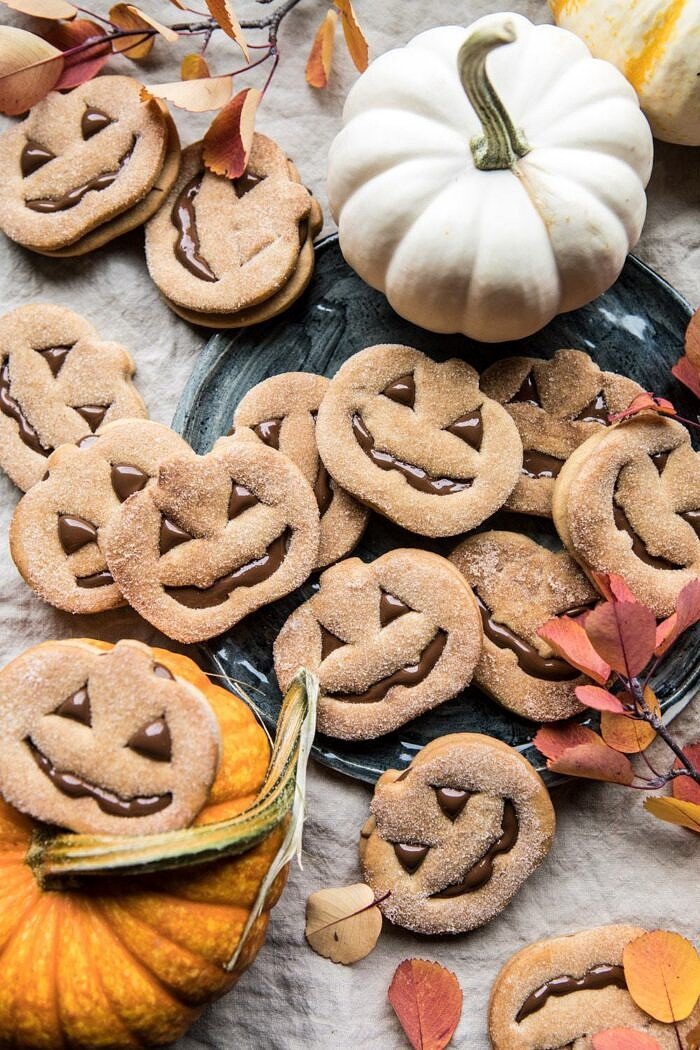
Cinnamon Sugar Coating: 2 tablespoons salted butter, 3 tablespoons cinnamon sugar Directions: 1. In a large mixing bowl, cream together the butter, sugar, and vanilla until light and fluffy, about 3-5 minutes. Add the eggs, one at a time, and mix until evenly combined. Add the flour, baking soda, cinnamon, ginger, nutmeg, and salt, beat until combined and the dough forms a ball. 2. Generously flour your work surface. Divide the dough in half and flatten each half into a disk. Roll out the dough to 1/4 inch thickness. Make sure you're using enough flour or your dough will stick. Cut out the cookies using a pumpkin cookie cutter. Carefully transfer the cookies to a parchment lined baking sheet. Cut eyes and a mouth in half the cookies using a pairing knife or cookie cutter. Cover the baking sheet and place the sheet in the freezer, freeze until firm, about 15-20 minutes. Roll out the leftover scraps, and repeat with the remaining disk of dough. 3. Preheat oven to 350 degrees. Bake the cookies on the middle rack of the oven for 8-12 minutes (for soft cookies) or until just lightly golden brown. Do not over bake. Cool on the baking sheet five minutes and then transfer to a wire cooling rack to cool completely. 4. Add the butter to medium pot. Allow the butter to slightly brown until it smells toasted, about 2-3 minutes. Stir often. Remove from the heat and let cool 5 minutes. Brush the butter over the top half of the cookies and then sprinkle the cookies with cinnamon sugar. 5. To assemble, spread the melted milk chocolate over the half of the cookies with no face. Place the top pumpkin faced cookies over the chocolate, gently pressing to adhere. Cookies can be served immediately or let the chocolate firm up and store in an airtight container for up to 3 days. .gif) .gif) |
||||||||
| Halloween Swirl Cream Cheese Brownies | ||||||||
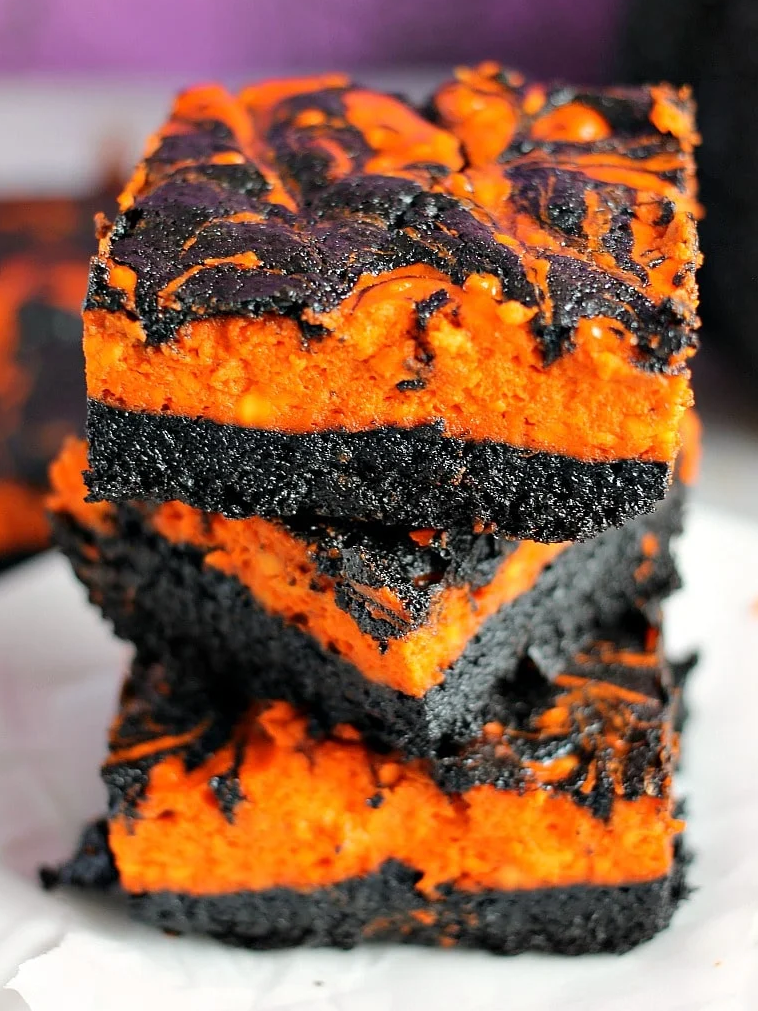
For the Cream Cheese Layer: 8 oz cream cheese at room temp, ¼ cup granulated white sugar, 1 large egg, ½ teaspoon vanilla extract, orange food coloring. Directions: 1. Preheat oven to 350 degrees. Line an 8 x 8 baking dish with parchment paper or foil and spray with non-stick spray. Set aside. For Brownies: 2. In a medium bowl, add the sugar, flour, cocoa powder, salt, and baking powder. 3. In a small bowl, add the eggs, oil, and vanilla. Mix with a fork until well combined. 4. Pour the wet ingredients into the dry ingredients and mix with a spatula until just combined. 5. Reserve 1/4 cup of the batter for the swirls then pour the remaining batter into the prepared baking dish. For Cream Cheese Swirl: 6. In a medium bowl, add the cream cheese, sugar, egg, & vanilla. Blend until smooth. 7. Add in the orange food coloring and stir to combine. 8. Gently spread the cream cheese layer on top of the brownie batter. 9. Drop tablespoons of the remaining brownie batter on top and gently swirl with a knife or skewer. 10. Bake for 30-35 minutes or until set. Remove and let cool completely before slicing. .gif) .gif) |
| Halloween Jalapeno Poppers | ||||||||
|---|---|---|---|---|---|---|---|---|
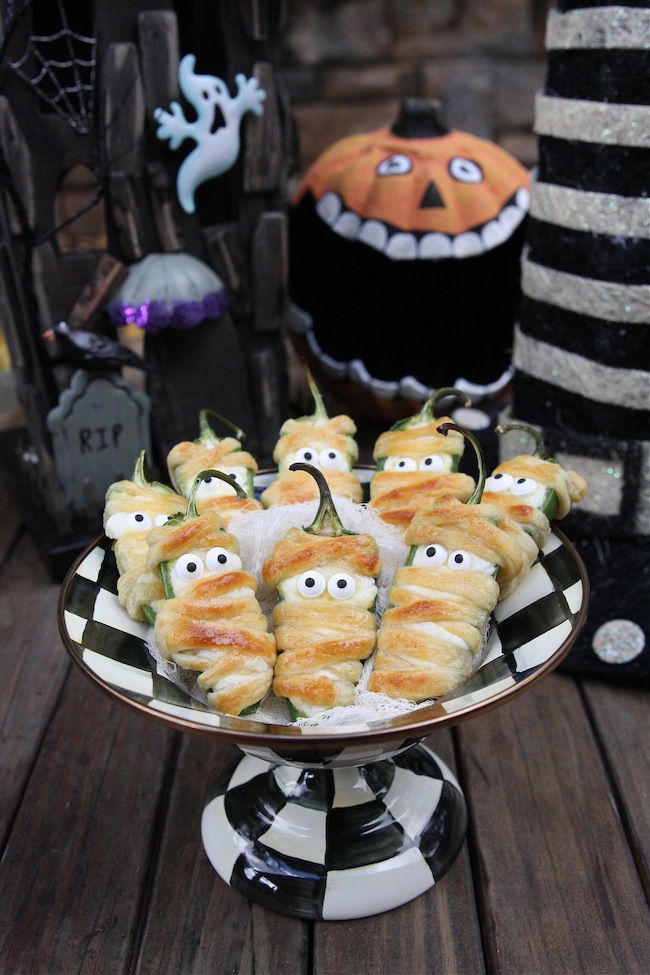
Directions: 1. Preheat oven 400° F. In a small bowl, mix the cream cheese, jack cheese, scallion and salt until well blended. 2. Roll out the crescent rolls and separate into 4 rectangles (not triangles) with a perforation in the middle of each. Press your fingers into the perforations to seal them. Using a pizza cutter, cut each rectangle into 10 long pieces lengthwise. 3. Fill each jalepeño half with the cheese mixture. Wrap each jalapeño half with the dough, leaving a space for the eyes. Use two pieces of dough if necessary. Brush with egg mixture and place on baking sheet. 4. Bake in oven for 8-10 minutes. Remove from the oven and press the eyes into the cheese where the opening is. Serve immediately. .gif) .gif) |
||||||||
| Peanut Butter Monster Munch Halloween Party Mix | ||||||||
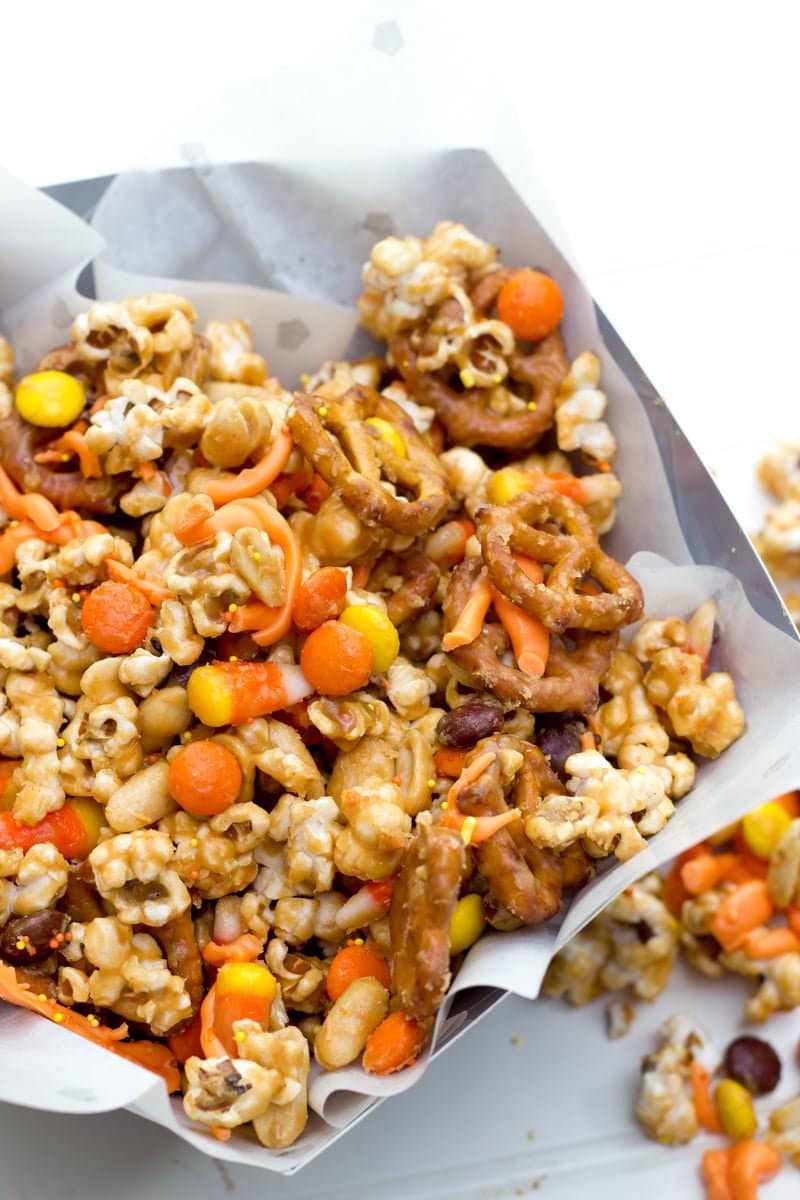
Directions: 1. Mix the popcorn, pretzels, peanuts, candy corn, and Reese’s Pieces in a very large bowl and spread out onto two large rimmed baking pans. 2. Melt the butter in a large saucepan over medium-high heat. Add the honey and sugar and stir until smooth. Stop stirring, allow the mixture to come to a boil, and cook for about 5 minutes, tilting the pan occasionally to make sure there are no signs of burning. The mixture should smell caramelized and be a bit darkened in color. Remove from the heat and carefully stir in the peanut butter, salt, and heavy cream. 3. Quickly drizzle the peanut butter caramel over the party mix on the sheet pans, then toss to coat with two large spoons. Drizzle with melted orange candy melts and sprinkle with sprinkles, if using. Let the party mix cool on the sheet pans, then transfer to bowls for serving, breaking up any large pieces if needed. .gif) .gif) |
||||||||
| Mummy Pumpkin Pie Cookies | ||||||||
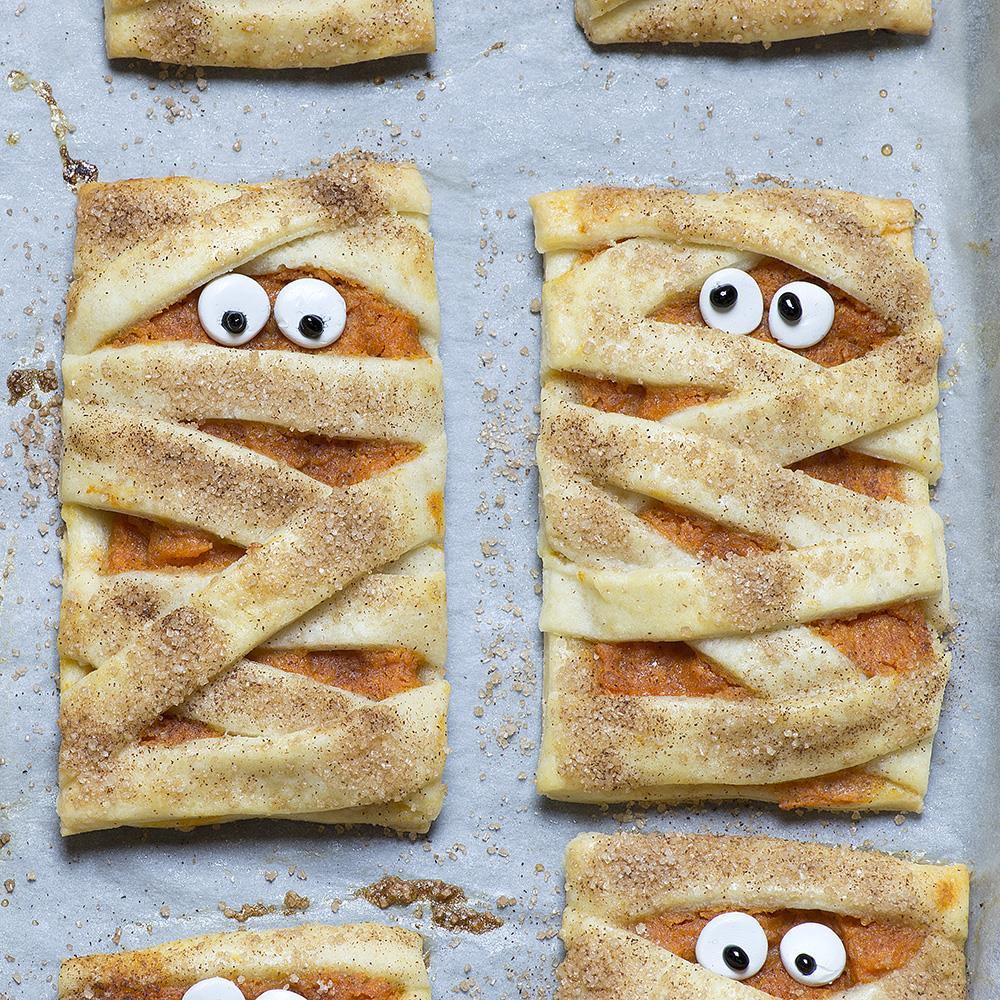
Filling and Topping: 3/4 cup reduced pumpkin puree (place 1 cup pumpkin puree on several layers of paper towel, wrap and press to soak excess moisture until you get 3/4 cup pumpkin puree), 2 oz cream cheese -slightly softened, 2 tablespoons packed light-brown sugar, 2 tablespoons granulated sugar, 1 teaspoon ground cinnamon, 1/2 teaspoon ground ginger, 1/4 teaspoon of nutmeg, 1/8 teaspoon allspice, 1 egg yolk, 1/2 teaspoon vanilla extract, 1 egg white-lightly beaten, 1/2 tablespoon water, 2 tablespoon sugar, 1 teaspoon cinnamon. Directions: 1. To make the crust pulse together in a food processor flour, salt and sugar, then add butter and pulse until look like a coarse meal (don’t over-process, just pulse until butter is no longer in large pieces). Add chilled water 1-2 tablespoon at the time and pulse several times( if it doesn’t come together in clumps add remaining water). If you don’t have a food processor you can make the dough using two fork or pastry blender. Gather dough onto working surface, divide into two portions, shape each into 5-inch disk, cover with plastic wrap and chill 1 hour. 2. To make the pumpkin pie filling in a bowl stir together cream cheese, granulated sugar and brown sugar to blend. Add reduced pumpkin puree to cream cheese mixture along with cinnamon, ginger, nutmeg and allspice. Mix in egg yolk and vanilla extract. Cover bowl and chill until ready to assemble the cookies. 3. Preheat oven to 375 F and line large baking sheet with parchment paper, set aside. 4. Roll out first disk of the dough onto a floured surface to about 13 x 11-inch rectangle . If the edges start to crack a little when rolling, seal them and continue rolling. Trim edges to get straight edges, then cut into rectangles( I made nine 4×3 rectangles, but you can make them smaller or larger, what ever you prefer) Roll out second dough disc and cut into 1/2 inch stripes. 5. Arrange the rectangles, spaced apart on prepared baking sheet and spread heaping 1 1/2-2 tablespoons of pumpkin pie filling onto each rectangle, leaving rim on all sides uncoated. Brush uncoated edges with the mixture of lightly beaten egg white and 1 Tbsp water. Top with strips to create mummy look, then seal edges with your fingertips, and trim the excess of the stripes. Brush the stripes with egg whites and sprinkle with mixture of 2 Tbsp sugar and 1 tsp. cinnamon. 6. Bake until golden brown about 20 minutes. Stick candy eyes onto cooled mummies. .gif) .gif) |
||||||||
| Monster Eyeball Rice Krispie Bites | ||||||||
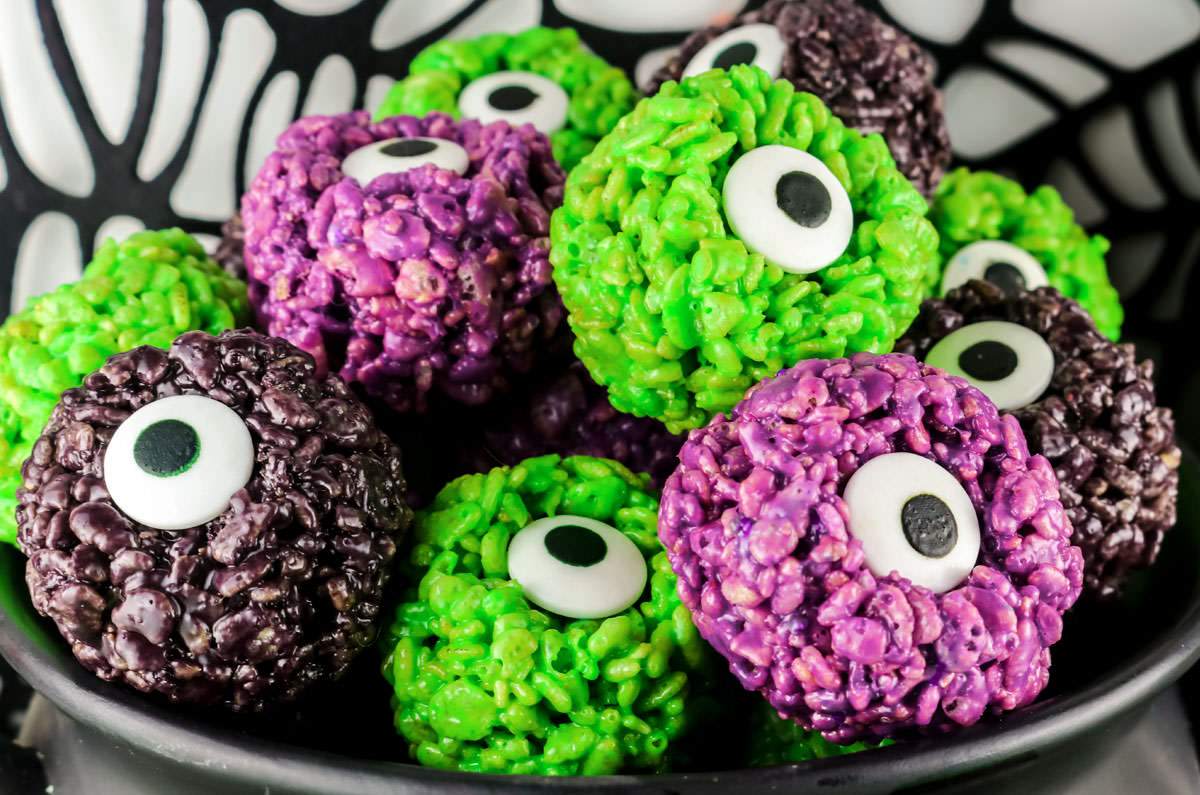
**You will need to make three batches of Rice Krispie Treat mixture - one for each of the three Monster Eye colors - Green, Black, and Purple.** Directions: 1. Melt 2 tablespoons butter in a medium pan. 2. Add 2 cups of Mini Marshmallows and stir until the marshmallows are completely melted. 3. Take the pan off the heat. 4. Add food coloring and mix. 5. Add 2 cups of Rice Krispie Cereal and mix until they are completely covered with the marshmallow mixture. 6. Allow the Rice Krispie Mixture to cool slightly. 7. Measure .7 oz of mixture and roll into a ball. 8. Press a large Wilton Candy Eye into the ball. Mold the Rice Krispie Treat mixture around the eyeball. If the Rice Krispie Treat mixture is still warm when it cools the Candy Eye will stick to the Monster Eyes Rice Krispie Bites. 9. Allow Rice Krispie Bites to cool. 10. Repeat for the other two Monster Eye colors. **Food Coloring Guide: Purple: 4 Drops of Pink, 1 Drop of Blue, 1 Drop of Red Black: 4 Drops of Black Green: 4 Drops of Yellow, 1 Drop of Blue** .gif) .gif) |